Lydusa
- Damage30
- Health40
 IMMUNE
 0
0 10
10 0
0
- Experience Gain
0
- Damage15
- Health300
 IMMUNE
 0
0 10
10 0
0
- Experience Gain
0
“”
Behavior[edit | edit source]
Lydusa will hover in the air high above the arena, almost exclusively using ranged attacks.
- Shard Burst: Lydusa sends several scattered projectiles at the Traveler. On impact, they place a lingering Shard Field.
- Crystal Lance: Lydusa flings one or two crystals at the Traveler. The projectiles move incredibly fast and home agressively, making simple strafing ineffective.
- During the windup for this attack, random Shard Fields will detonate.
- Gemstone Tears: Periodically, tears will begin dripping from Lydusa's eyes. This allows her to dash to the side, leaving a line of 5 Tears. The Tears will slowly sink towards ground. They will remain idle until Lydusa hums, causing them to fire projectiles at the Traveler.
- Each Tear can fire two projectiles before dying, releasing a third on death.
- The fourth Tear will have a bright yellow glow around itself. It has much higher health, but counts as a weakspot for the group, destroying the rest when it itself is destroyed.
Fight Progression[edit | edit source]
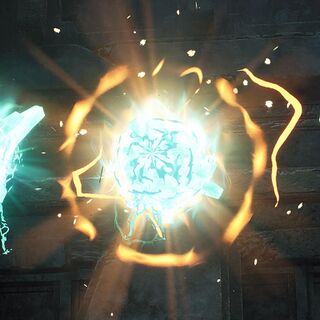
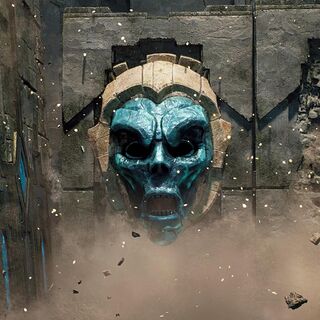
Upon reaching 77% remaining health, Lydusa gains access to an enraged mode. She roars, shattering her mask and destroying all tears. Her crystalline face is her weakspot, remaining active through this sequence.
She will begin a series of attacks, pulling from a set of three abilities:
- Boulder Smash: Lydusa creates a large boulder underneath herself, and crashes down onto arena two or three times, creating large shockwaves.
- Saw Rush: Lydusa creates a serrated stone mass underneath her, and rapidly moves across the room, continuously dropping Shard Fields directly underneath herself. After a moment, she charges at the Traveler.
- Halo of Tears: Lydusa rushes to two locations, creating circles of 5 Tears that sink down onto the arena, with the weakspot of the groupo being randomly chosen. The Tears will remain idle until triggered.
Afterwards her mask reforms, and any created Tears begin their attack. Her next Crystal Lance will also detonate any Shard Fields created during this sequence.
The very first time will always consist of three Boulder Smashes followed by two Saw Rushes; afterwards it will choose one from several patterns of six to seven attacks.
Lydusa also unlocks one last ranged attack:
- Crystal Slash: Lydusa sends a wide diagonal blade flying at the Traveler.
- Can be followed up by a second blade, which will be either on the opposite diagonal or horizontal.
Final Phase[edit | edit source]
Once brought down to roughly 37% health, Lydusa's behavior changes entirely. She becomes incorporeal and moves towards the throne, sinking into the arena.
The sides of the arena fold up, leaving only a narrow corridor to move in. Walls rise from Lydusa's position, rapidly moving towards the other end of the arena. They will damage the Traveler on hit, and push them back—stopping just short of the end, where a damaging sandstorm has formed.
Although the impact can be negated by precise doding, simply moving to a gap is much easier. Sometimes however, all three segments will be full walls, with one displaying Lydusa's face. This segment can be destroyed, counting as weakspot. They will also transfer some damage back to her, which is the only way to deplete her health in this form.
Alternatively, all three segments will be walls with a small gap at the bottom, requiring crouching to avoid.
Once Lydusa reaches her last 13% of health, time is of the essence. She re-emerges, her weakspot exposed, and begins to slowly move the walls together. If not defeated quickly enough, she will slam them together, instanly killing anything caught between.
However, she is much more easy to stagger, which will delay the wall's advance.
Rewards[edit | edit source]
- Eye of Lydusa used to craft Monolith.
- Blossoming Core used to craft Mirage if the Cherished Fracture is used at Goddess's Rest. This will prevent the Traveler from fighting her.
- Tear of Lydusa, After deciding Lydusa's fate, leave the area. Return later to find the ring resting on the ground where she once stood.
- Segment if killed in Campaign mode.
 Tome of Knowledge
 xxx
xxx X
X
Gallery[edit | edit source]
-
Lydusa's rage


